arrow_back_ios

Main Menu

See All Acoustic End-of-Line Test Systems See All DAQ and instruments See All Electroacoustics See All Software See All Transducers See All Vibration Testing Equipment See All Academy See All Resource Center See All Applications See All Industries See All Insights See All Services See All Support See All Our Business See All Our History See All Our Sustainability Commitment See All Global Presence
arrow_back_ios

Main Menu

See All Actuators See All Combustion Engines See All Durability See All eDrive See All Production Testing Sensors See All Transmission & Gearboxes See All Turbo Charger See All DAQ Systems See All High Precision and Calibration Systems See All Industrial electronics See All Power Analyser See All S&V Hand-held devices See All S&V Signal conditioner See All Test Solutions See All DAQ Software See All Drivers & API See All nCode - Durability and Fatigue Analysis See All ReliaSoft - Reliability Analysis and Management See All Test Data Management See All Utility See All Vibration Control See All Acoustic See All Current / voltage See All Displacement See All Load Cells See All Pressure See All Strain Gauges See All Torque See All Vibration See All LDS Shaker Systems See All Power Amplifiers See All Vibration Controllers See All Accessories for Vibration Testing Equipment See All Training Courses See All Whitepapers See All Acoustics See All Asset & Process Monitoring See All Custom Sensors See All Data Acquisition & Analysis See All Durability & Fatigue See All Electric Power Testing See All NVH See All Reliability See All Smart Sensors See All Vibration See All Weighing See All Automotive & Ground Transportation See All Calibration See All Installation, Maintenance & Repair See All Support Brüel & Kjær See All Release Notes See All Compliance See All Our People
arrow_back_ios

Main Menu

See All CANHEAD See All GenHS See All LAN-XI See All MGCplus See All Optical Interrogators See All QuantumX See All SomatXR See All Accessories See All Accessories See All BK Connect / Pulse See All API See All Microphone Sets See All Microphone Cartridges See All Acoustic Calibrators See All Special Microphones See All Microphone Pre-amplifiers See All Sound Sources See All Accessories for acoustic transducers See All Experimental testing See All Transducer Manufacturing (OEM) See All Accessories See All Non-rotating (calibration) See All Rotating See All CCLD (IEPE) accelerometers See All Charge Accelerometers See All Impulse hammers / impedance heads See All Cables See All Accessories See All Electroacoustics See All Noise Source Identification See All Environmental Noise See All Sound Power and Sound Pressure See All Noise Certification See All Industrial Process Control See All Structural Health Monitoring See All Electrical Devices Testing See All Electrical Systems Testing See All Grid Testing See All High-Voltage Testing See All Vibration Testing with Electrodynamic Shakers See All Structural Dynamics See All Machine Analysis and Diagnostics See All Calibration Services for Transducers See All Calibration Services for Handheld Instruments See All Calibration Services for Instruments & DAQ See All On-Site Calibration See All Resources See All Software License Management

18 Tips For Successful Sound Measurements


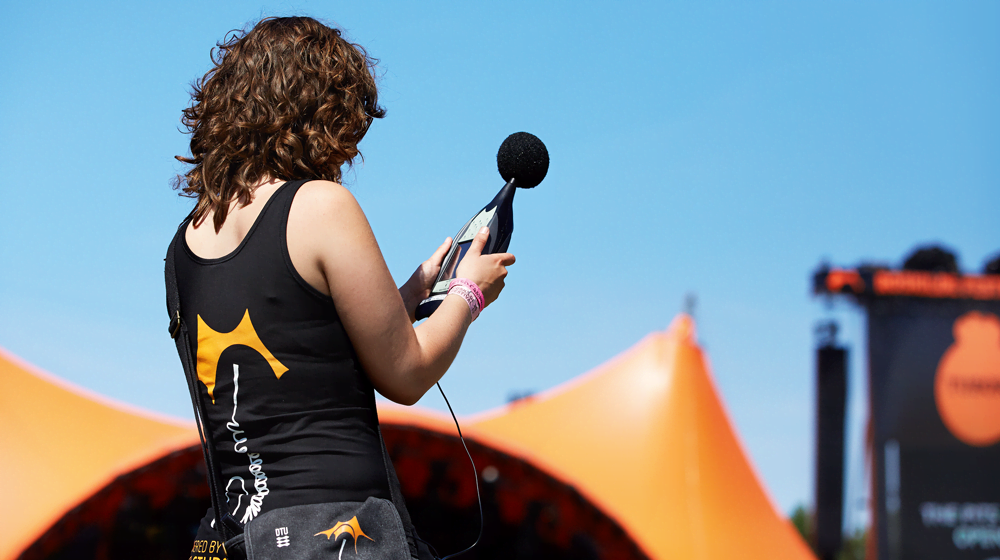
Conducting sound measurements requires a sound level meter of course, but the sound level meter itself is only one of the many things you need to remember when on a measurement job. In this checklist, we have collected 18 tips to help you get successful measurement results.
Setting up your Sound Level Meter

THE ULTIMATE SOUND MEASUREMENT CHECKLIST

Setting up your sound level meter before embarking on a measurement project will save you time and maybe even rework. Here are seven things to remember to check on your sound level meter before heading out on a project:


Tip 1 - Measurement Time

SYNCHRONIZE TIME ON YOUR SOUND LEVEL METER

During most measurements, you will be taking notes on events that are relevant to the report, often noting event times from your watch or phone. It’s important that the time on your sound level meter matches your timepiece, so that your notes match the recordings on the sound level meter. This becomes even more important when using two or more sound level meters.


Tip 2 - Measurement Logging and Reporting

SETUP MEASUREMENT INTERVAL

Some standards and regulations dictate specific measurement intervals. If your sound level meter supports logging at multiple time intervals (called logging and report periods on a B&K Sound Level Meter), consider setting the report period according to the standard’s requirements, and a shorter time for the logging period. This way, you combine the convenience of directly measuring the values for your report, with the ability to investigate and correct short disturbances. This can make life a lot easier when you start writing your report.


Tip 3 - Measurement Data Storage

CHECK STORAGE CAPACITY FOR MEASUREMENTS

This is a pretty basic point: Remember to check that you have enough free space on your memory card for the measurements you are about to make. Regularly deleting old measurements after they have been safely downloaded and stored, is a good habit to keep, as is keeping a spare memory card packed with your sound level meter.


Tip 4 - Sound Recording

RECORD AMBIENT SOUND

Sound recordings can be invaluable when post-processing your measurements, for identifying noises or performing detailed analyses like FFT-based tonality assessments. If your sound level meter supports sound recording, make sure to set it up to measure at the right resolution and sample rate for your needs. It should be noted that audio recorded with automatic gain cannot be used for analysis afterwards.


Tip 5 - Measurement Weighting and Bandwidth

SETUP WEIGHTING AND BANDWITH FOR YOUR MEASUREMENT

It is best to make sure that you measure the right frequency weighting and bandwidth for frequency analysis. While it is common practice to post-weight spectra, or to combine 1/3-octave bands into 1/1 octaves, there are potential pitfalls to both. Post-weighting can introduce significant errors when there are strong tones far from the centre frequencies. And while summing 1/3 octave bands works well for Leq data, it is not valid for many other parameters, like statistics or even Lmax or Lmin.


Tip 6 - Extended Low Frequency Measurement

BE CAREFUL WITH MEASURING LOW FREQUENCIES AND WIND

Measuring with an extended low-frequency range can increase the effect of wind-induced noise in your measurements, particularly those made with the Z frequency weighting. So only include extended low frequency when very low frequency noise is relevant.


Sound Meter Accessories

Aside from the checks you should perform on your sound level meter before conducting measurements, there are certain accessories that are almost always necessary:


Tip 7 - Measurement Calibrator

CALIBRATED SOUND MEASUREMENT

A sound calibrator, such as B&K Type 4231 Sound Calibrator, might be the most essential accessory for the job. For almost all measurement standards, you need to calibrate your sound level meter before and after each series of measurements.

First Sound Level Meter Measurement


Tip 8 - Sound Level Meter Windscreen

WINDSCREENS AND MEASUREMENT ACCURACY

You should always use a microphone windscreen for outdoor measurements. When using a windscreen, make sure that the sound level meter corrects for its influence on measurements. Some sound level meters can detect and correct for windscreens automatically. for outdoor measurements.


Tip 9 - Sound Level Meter Tripod

USE A TRIPOD FOR MEASURING

Tripods are used so that you don’t disturb the sound field with your body or your movements. Use any good microphone tripod or sound level meter tripod with the microphone attached. If the microphone is connected to the sound level meter by cable, use an extension rod to be sure that your measurements are correct and that you or your tripod do not interfere with measurement.


Tip 10 - Navigation Device for Measurements

IDENTIFY YOUR EXACT MEASUREMENT LOCATION

You will often need to measure at locations that are unfamiliar to you, and some locations such as undeveloped construction sites may not even have addresses, but coordinates. Bringing a handheld GPS device or smartphone can help you find the site – as well as being a great way of documenting your measurement locations. Sound measurements are not very useful if you do not know where they were taken!


Tip 11 - Measurement Notes - Notebook and Pen

TAKE NOTES OF YOUR MEASUREMENT CONDITIONS

Many sound level meters come with some form of built-in note taking feature, but a pen and paper are still useful for taking notes during measurements, or for making drawings. Survey sheets can also provide useful reminders for tasks like pre- and post-survey calibration checks.


Tip 12 - Digital Camera for Measurements

TAKE PICTURES OF YOUR MEASUREMENT CONDITIONS

Photos are often necessary to document your measurement setup, so a camera or a smartphone is important. And if someone wants to repeat the measurement, photos are essential.


Tip 13 - Traffic Counter for Measurements

COUNT TRAFFIC FOR ROAD NOISE MEASUREMENTS

When doing measurements on road traffic noise, you may need to know the number of cars. In this case, you should bring either an automatic traffic counter or a handheld manual counter.


Tip 14 - Distance Measuring Tool

NOTE YOUR MEASURING DISTANCE TO REFLECTIVE SURFACES

Sound levels can vary dramatically according to the distance from sound sources or reflecting surfaces. A measuring tape or a laser rangefinder can be used to measure these distances, ensuring that you place your sound level meter or microphone in the correct position.


Tip 15 - Batteries for Measurement

REMEMBER TO BRING BATTERIES

This may seem like a no-brainer but be sure to charge your batteries the day before going out on a job, and remember to bring a spare, charged battery pack. If you expect to be out for more than a normal working day, bringing a mains power supply is a good idea.


Tip 16 - Light for Measurements

REMEMBER TO BRING A LIGHT

For night-time measurements, you need to see where you are going and what you are doing, to prevent injury and make your life easier. A headlamp gives you free hands to work.


Tip 17 - Phone for Measurements

BRING YOUR PHONE FOR ANY QUESTIONS

When in the field, you might need to clarify specifications or have questions that need to be answered. A phone and the contact information for key people can be invaluable to get the job done.


Creature Comforts


Tip 18 - Clothes and food for measurements

DON'T FORGET CLOTHES, FOOD - AND PLENTY OF COFFEE

When doing measurements outdoor, it is important to be comfortable in any kind of weather. Check the forecast and remember to bring gloves, rain gear, a hat, boots, warm socks, sunscreen lotion and insect repellent as necessary. Also, you will need food, snacks and beverages to keep up your energy. A thermos of coffee can save the day when you are out for a while.